Trending

Showing posts with label nail art. Show all posts

January 2, 2015

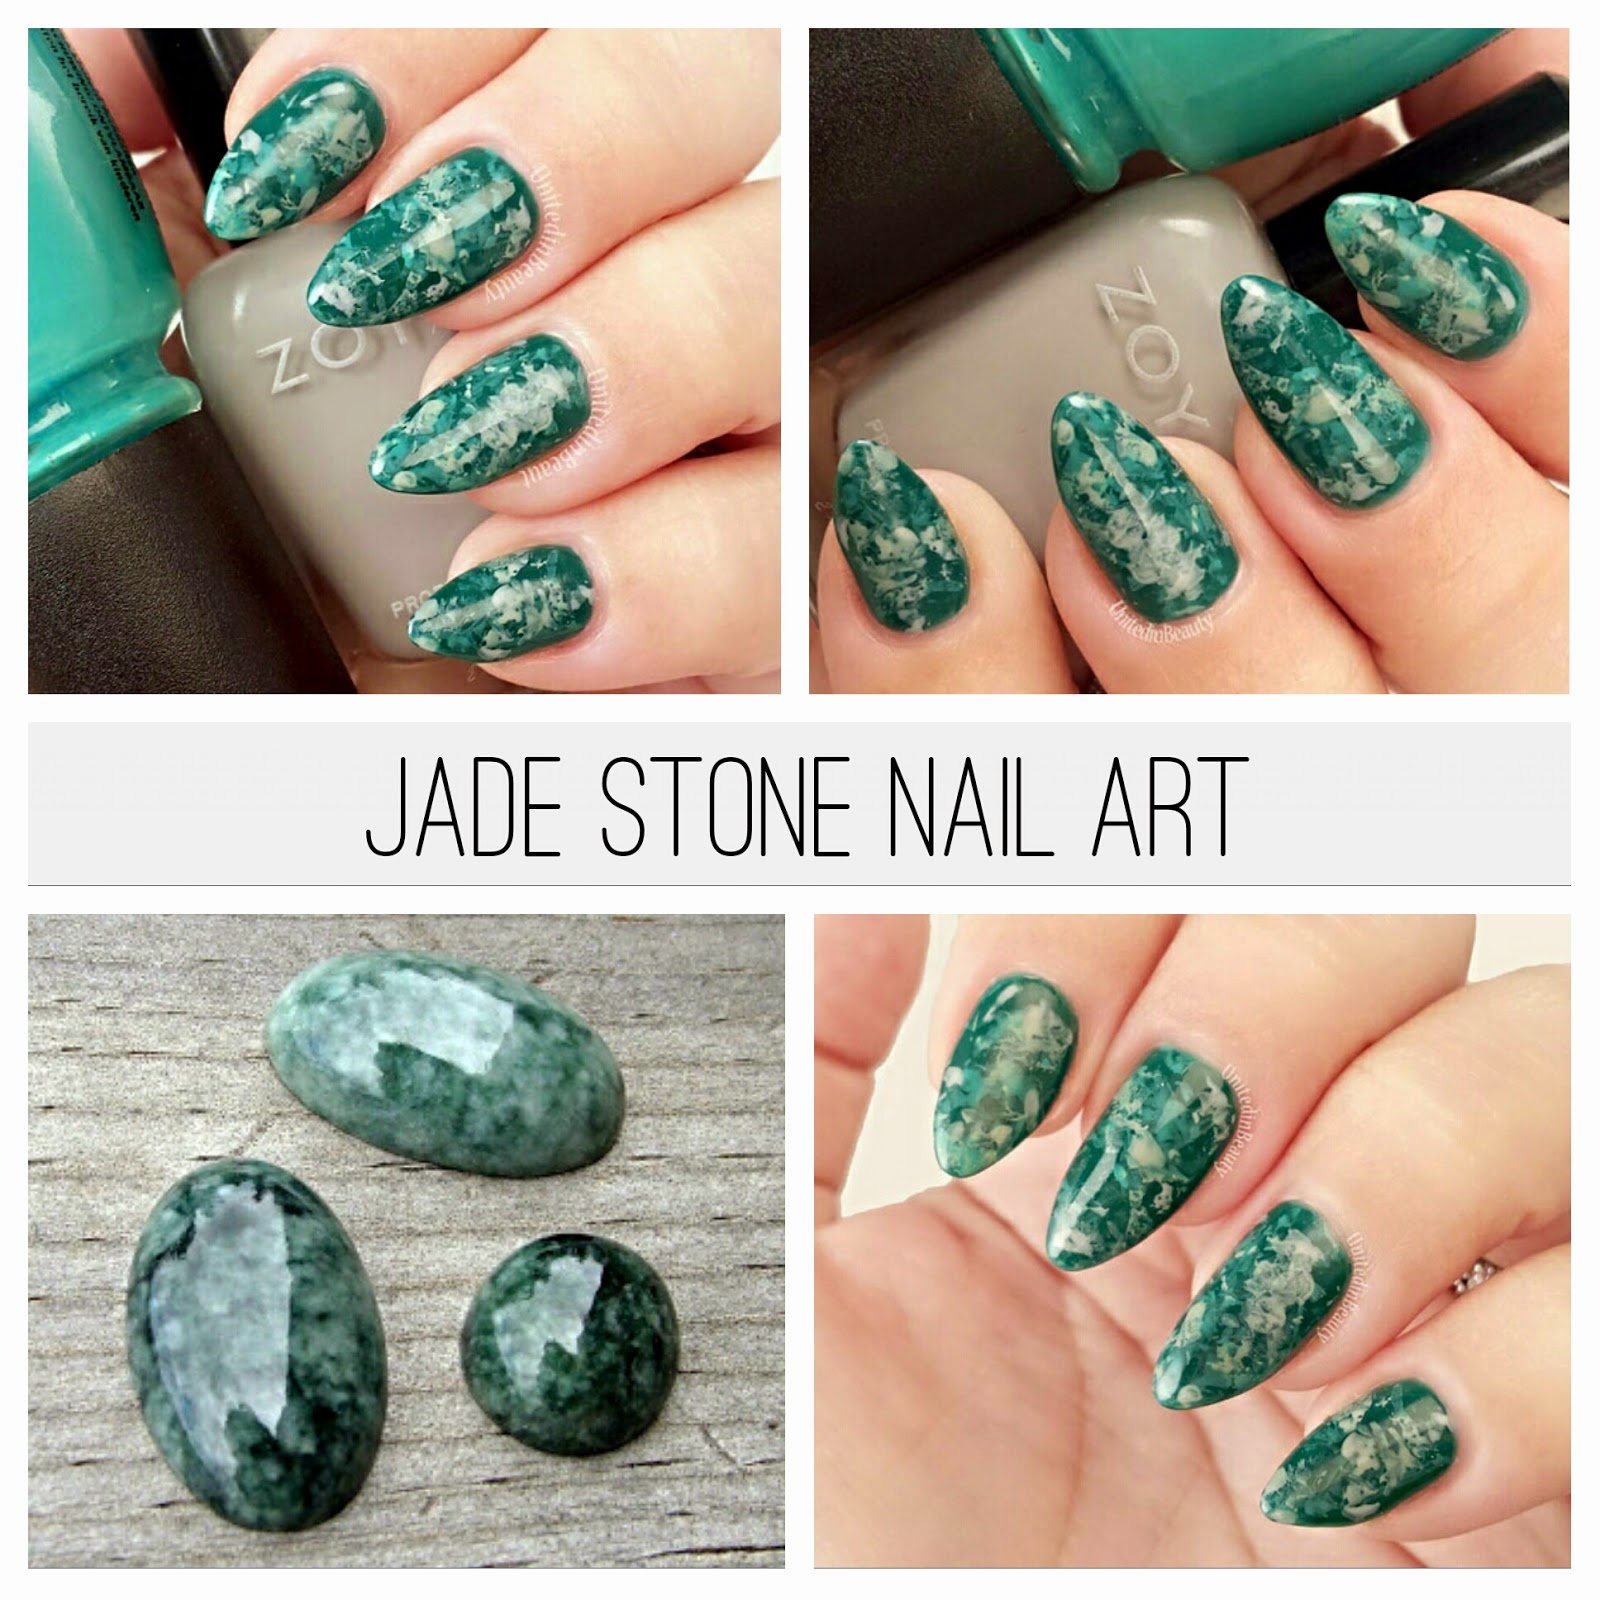
Jade Stone Marble Nails

jade stone marble nails by @unitedinbeauty
Welcome to 2015 everyone! Looks like we all made it, LOL! I've been feeling super inspired by jewelry lately, and I have this gorgeous Jade ring that has just been screaming out for me to recreate on my nails. All in all, I'd say that this is a pretty close match to a real jade stone!
- Polishes  Used -
  • Base Color: Gilty Girl - Jinx
  • Marble Effect: Zoya - Dove and China Glaze - Four Leaf Clover     
- Extras - 
  • Clear Plastic Cling Wrap
Step 1: Begin by applying 2 coats of Jinx by Gilty Girl and allow to dry completely. 
Step 2: Once dry, take a small bunched up piece of clear plastic cling wrap and dip it in a small amount of Zoya Dove. Dab the excess on a napkin, then use a very light hand to dab the polish on to your nails. 
Step 3: Allow the first layer to dry, then repeat the cling wrap process, this time using China Glaze Four Leaf Clover. 
Step 4: Once you are happy with the look of your jade stone marbled nails, apply a coat of Seche Vite Fast Dry Topcoat to mesh the colors together and seal the look.

I'm really into the look of stone nails right now. I might have to try turquoise nails soon, but man that spotted water marble sure is intimidating!

And there you have it! If you are inspired by or recreate this look, I'd love to see it! Use hashtag #HeyUnitedinBeauty on Instagram or send me a tweet on Twitter!

SHARE:

December 23, 2014

White & Gold Flakes with Handpainted Ornament - 12 Days of Christmas Holiday Manicures Day 12

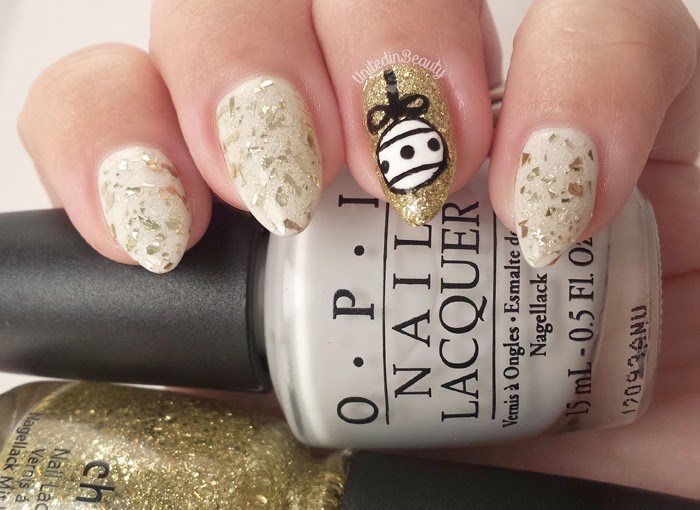
White & Gold Nails with Handpainted Ornament by @unitedinbeauty
It's the final day of Christmas manicures, can you even believe it? It feels like it went by so fast,  I  have so many more ideas! I either need more days until Christmas, or more nails...  I started with a base of OPI- My Boyfriend Scales Walls, then I decided to go out with a bang today and break out both my handpainting nail art skills AND 18k gold topcoat for this one. I'm so faaaancy!
White & Gold Nails with Handpainted Ornament by @unitedinbeauty
Polishes used: OPI- My Boyfriend Scales Walls & Mariah Carey Pure, China Glaze - Blonde Bombshell, Seche Vite Topcoat   
While I do love the OPI - Mariah Carey Pure 18k gold flake topcoat, I have to admit that the flakes are quite small, which is a bit of a disappointment. It seems like every time I use it I always end up wanting more. The other day while I was out and about, I spotted  Maybelline Color Show Jewels - Gilded in Gold and I just couldn't resist picking it up. These flakes are much bigger, and are exactly what I was hoping for out of the OPI topcoat. By layering both of these polishes, I got exactly the look I was going for.

For maximum blingage, I added a gold accent nail using China Glaze - Blonde Bombshell and used acrylic paint for the hand painted ornament. I gotta admit, the ornament turned out way cuter than I thought it was going to, I'm pleasantly surprised! A nice coat of Seche Vite added so much shine to these it's insane. Can't wait to wear them to my family Christmas party! Well that's a wrap on my 12 Days of Christmas manicures, I hope you enjoyed it as much as I did! In other news, I'm considering trying out video tutorials for my nail art, but I'm honestly just not even sure where to begin,. Let me know down below if you have any tips or tricks for getting started!

What do you think of these gold flakey nails, just enough bling or too over the top?
SHARE:

December 16, 2014

Gold Sparkles with Glittery Bow Accent Nail - 12 Days of Christmas Holiday Manicure Series Day 5

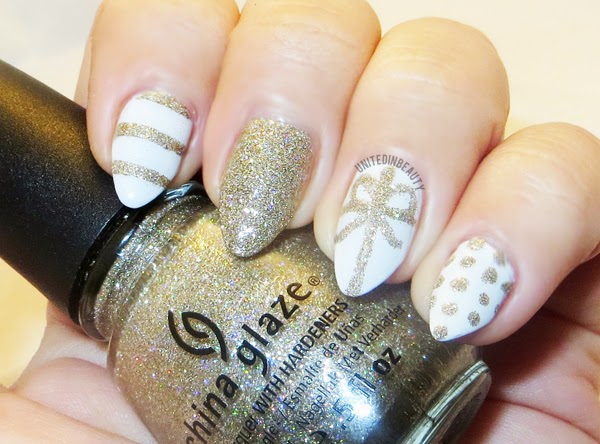
Christmas Present Nails
I've never been a huge fan of gold, but lately I can't seem to get enough of it! This manicure is quick and easy and got a lot of compliments today, which is always a plus, right? I think I may have to bust it out again once it comes time for Christmas parties!
Christmas Present Nails
I started with 3 coats of OPI - My Boyfriend Scales Walls, which I have found to be the perfect off white shade. I've searched high and low for a white that is not too stark, but not too yellow and so far this seems to be it. After that was completely dry, I used striping tape to create the lines on my index finger, and a medium sized dotting tool to make the polka dots on my pinky.
Christmas Present Nails

Maybelline Color Show Jewels Gilded in Gold

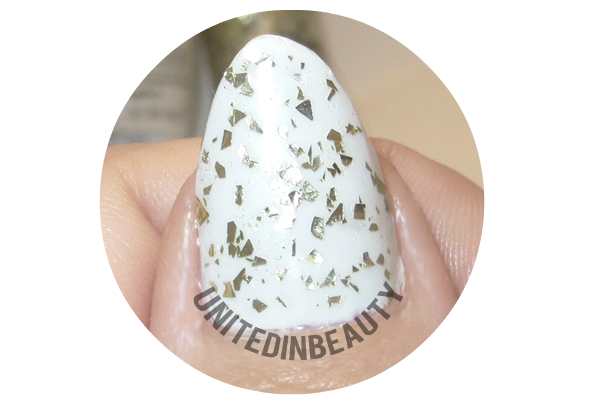
I decided to go full on bling for the middle finger, and used a small nail art brush to draw in the bow accent on my ring finger. Since it was a bit difficult to see in the other photos, I took a close up of my thumbnail and the gold flakes. On my thumb, I used one good coat of Maybelline Color Show Jewels in Gilded in Gold. Well folks, that's it for day 5! See you tomorrow!

How are you all enjoying the 12 days of Christmas Manicures so far? Are there any looks you like to see me create?
SHARE:

December 10, 2014

Glittery Stiletto Hearts - And Debuting My New Nail Shape

Is anyone else as obsessed with stiletto nails as I am right now? I've always been a "squoval" ( square and oval)kind of gal when it comes to my nail shape, but I've got a secret love of stiletto nails. Well, I got a bee in my bonnet the other night and decided I was going for it! Once I had the shape, this seemed like the perfect manicure to go with it.


My favorite thing about this manicure is how quick and easy it was! Two nail colors, a small detail brush and 10 minutes later here we are! This would be super cute for Valentine's Day or even a date night too.


I began by applying my favorite base coat, and once that was dry I began creating the hearts on the tips. I used China Glaze Ruby Pumps for the red hearts and Zoya Storm for the black accent nail.

Polishes Used: China Glaze Ruby Pumps & Zoya Storm

I eyeballed the center line of the nail, and from there created the two arches that would create the heart. Once that was finished, a quick swipe of the brush along the middle and edges completed the look. Topped with Seche Vite topcoat, we're all done! Easy, peasy!


Ruby Pumps has got to be my all time favorite glittery red, it's just so perfect. If you've been searching for that perfect shade, I highly recommend giving this one a try!

Share your thoughts about stiletto nails and this red glittery heart design below. What do you think of the trend? Is it a hit or a miss for you?
SHARE:

November 25, 2014

Bright Ikat Nail Art

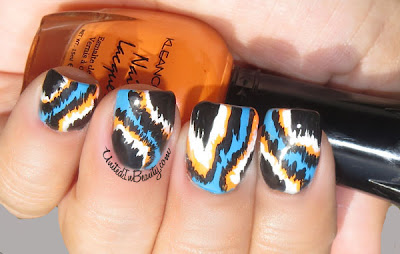
In an attempt to redeem myself after my last nail art snafu, I come to you today with this super fun and super bright ikat nail art! I've never tried ikat nail art before, but now that I have I think I will be doing it a lot more often! I can't stop staring at my nails today!

Ikat nail art design

For this design I started with a base coat of China Glaze - Sunday Funday and let it dry completely. Next, I used a KleanColor-Mango and a small nail art brush to create small flame shaped areas in the corners of each nail.

Ikat nail art design

Next, I added another layer onto the flame shapes using China Glaze - White on White. The great thing about this look is that you can be messy! The key to these steps is to apply the polish with jagged edges, because if the polish splotches are too neat, then the look will not come together properly at the end.

Ikat nail art design

For the last and final step, I used Orly - Liquid Vinyl and created the last layer of black by using my smallest nail art brush and very light jagged strokes. As always, I applied my secret weapon, Seche Vite for my glossy finish!

Ikat nail art design
Polishes used: China Glaze - Sunday Funday & White on White, KleanColor - Mango, Orly - Liquid Vinyl
I really love this color combination! What do you all think, did I redeem myself? ;)


SHARE:

October 26, 2013

Gradient Nail Art With Zoya Rafael Cennamo Spring/Summer 2013 Collection

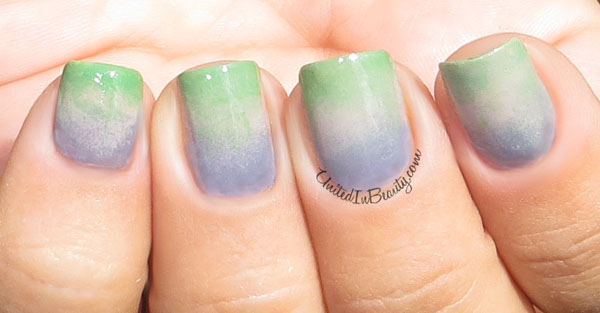
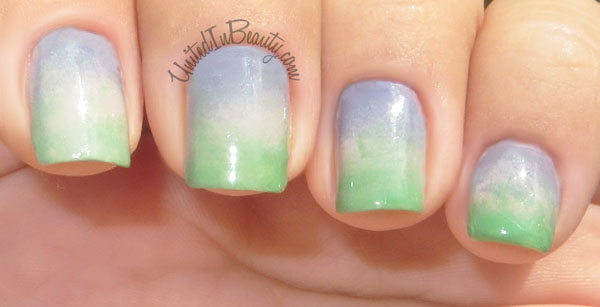
Today I was feeling inspired by the soft color palate of the gorgeous Zoya Rafael Cennamo Spring/Summer 2013 Collection and thought that they would look amazing together. This pretty gradient nail art was done using three of the nail polishes from the new collection. I really love the way the gradient came out, the finished look almost reminds me of a soft watercolor painting.

Gradient Nail Art

In order to create this look, I used three different Zoya polishes and sponged them on to my nail to create the faded gradient design. Zoya Caitlin is at the base of the nail, Zoya Kennedy is in the middle, and Zoya Wednesday is sponged on the tips.


Gradient Nail Art

When using the sponged gradient technique it is common for the result to look a bit thick with noticeable lines of division between color until a top coat is applied, so don't spaz out if you try it and notice it doesn't quite look right yet. No need to freak your freak! I personally almost always use a coat of Seche Vite to smooth out the polish and top off my nails with a glossy finish. 


If you are going to be trying a sponged gradient, you also will want to always keep the sponge damp in order to get the smoothest color blend. I let mine sit in a small cup of water until I am ready to use it. Gradients are so fun! I'd love to hear about your gradients too, what are your favorite colors/polishes to blend together?

SHARE:

May 29, 2013

Nail Art Featuring Zoya Darcy & Josie

Happy Wednesday, friends! To be honest with you, I think mid-week fatigue must be setting in for me today because this color combination and design looked a lot better in my head then it does on my nails, LOL! I'm not even entirely sure what this look is, but alas I shall still present it! Feast your eyes on these shebangys!


This look was done using two coats of Zoya - Josie as a base, then one coat each of China Glaze - White on White and Zoya -Darcy for the design on the nail art. For the shiny finish I used Seche Vite topcoat.


These totally remind me of egg splatters, what do they remind you of? I've just gotta know! What do you see when you look at them?
SHARE:

May 7, 2013

Bright Cheetah Print Nail Art

Gathering inspiration from my trip to the local zoo, today I am rocking this super fun and super bright yellow, black and blue cheetah print nail art. Animal prints are some of my favorite designs since they are so eye catching and easy to do. This simple cheetah print design can be created using nail art brushes, dotting tools, or even toothpicks in a pinch. As an added bonus, with cheetah print the color combinations are endless!
Bright Cheetah Print Nail Art
Polishes used: China Glaze - Happy Go Lucky, Ruby Kisses - Teal Envy, Orly - Liquid Vinyl, Wet N' Wild - Silvivor
I'm an old lady now and the zoo wore me the heck out, so I'm just popping in for a quick post today, but if there is enough interest, I may try my hand at putting together a tutorial on how you can re-create this look. Let me know what you think in the comments!


SHARE:

April 28, 2013

Wet N' Wild Violet and Lavender Color Blocked Nail Art

Today I have a great Springtime look that I put together using two of the new Wet N' Wild Megalast nail polishes - On a Trip and Through the Grapevine. Both of these purple polishes caught my eye and were just too lovely for me to pass up and leave sitting there on the shelf.


I don't have too much experience with the Wet N' Wild brand, so I was a bit surprised when I pulled the cap off and got a good look at the brush. The brush is a bit on the thick side and is also awkwardly shaped in an uneven arch. According to the sticker on the top of the bottle this is called their "ManiCurve Pro Brush," and unfortunately I have to say that I am not a fan at all. I found that the bristles are way too stiff and the brush itself was also too thick, which made polishing a very messy task. For that reason alone, I think I'll be staying clear of the Megalast polishes for a while.


I started this look off by painting my nails with two thin coats of the lighter lavender polish, called On a Trip. If you are recreating this look, you will want to be be absolutely certain that the first layer of nail polish is completely dry before moving on, or you're going to have a bad time. Once the lavender layer had dried completely, I started to move on to the next step.
    
  
Using short strips of manicure tape, first I started by dividing each nail up into four equal quadrants. Next, I used the darker violet color that is called Through the Grapevine to fill in both the top and bottom sections. While the polish was still wet, I pulled the tape off and let the violet sections dry completely. A little pearlized bead glued smack dab in the middle finished off the look, and viola, adorable Springtime color block nail art!


SHARE:

April 26, 2013

Green Camouflage Nail Art With China Glaze and OPI

Those of you that follow me on Facebook and Twitter may already know that I got a little overanxious yesterday and decided that I was going to leave my nails naked and bare without nail polish until my Zoya Earth Day Promo polishes arrived. Upon noticing that my nail polish order is not due to arrive until the 29th, I suppose that was a bit over-ambitious. 

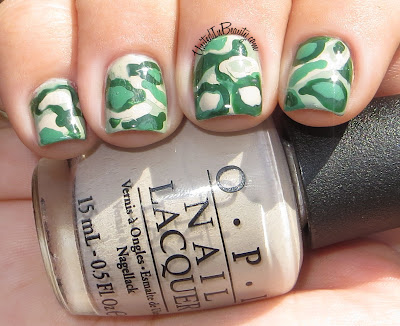
We all know I can't go that long without painting my nails, I just can't. Based on that and that alone, I present to you my camo inspired manicure for today's nail art look!

Green Camo Manicure Nail Art

I decided to start out with painting a base coat of one of my lesser used polishes, a light Army green color called Kaki by a brand called IrisColors. I found this polish at a small neighborhood beauty supply store a while back and always forget I have it. My apologies that you will probably not be able to locate this exact color easily, but any light Army green will do for this look.


Green Camo Manicure Nail Art

Next, I just used my polish brushes to begin to randomly splotch small areas of the nail in three accent colors, which are:
O.P.I - Did You Ear About Van Gogh? 
O.P.I. Don't Mess With OPI
China Glaze - Holly Day
Camo Nail Art Manicure
Polishes used: OPI - Don't Mess With OPI & Did You Ear About Van Gogh? China Glaze- Holly Days, IrisColors - Kaki
In order to increase the randomness of the splotches, I layered up a few of them. I found that this really helped give my nail art the authentic camouflage look.

At this point, my manicure began to look a bit bumpy from the different layers of polish that I had dabbed on. Not to worry though, one good thick coat of Seche Vite (what I consider to be my miracle topcoat) smoothed everything right out and left me with a high shine glossy finish.

SHARE:

March 28, 2013

Metallic Blue On Black Laser Tape Nail Art


Today's manicure is a fun metallic blue on black look that was made with laser tape. Originally, I had planned to place the tape, paint a second color over the top and then remove the tape to reveal different colored polish lines but once I put the tape on, I liked the look of this nail art and decided to skip the other steps.
Polishes Used: Orly - Liquid Vinyl, Seche Vite Topcoat, Blue Laser Tape
This nail art is pretty simple to create. Begin by painting the nails a base color (I used Orly - Liquid Vinyl), and allow to dry completely. Next, pick a colored laser tape and place strips in a random pattern across the nails. Snip the ends using a cuticle nipper and viola!


SHARE:

January 28, 2013

Kaley Cuoco's Heart Themed SAG Awards Mani


Just when I think Kaley Cuoco couldn't get any cuter, she somehow manages to find a way. I absolutely ADORE the heart themed manicure with nude cutout hearts she was sporting last night at the SAG awards! The mix of candy apple red and nude is very playful, and a recreation would be perfect for Valentine's Day, so adorable!

Kaley Cuoco Sag Awards
Photo: Getty
SHARE:

January 25, 2013

31 Day Challenge - Day 05: Blue

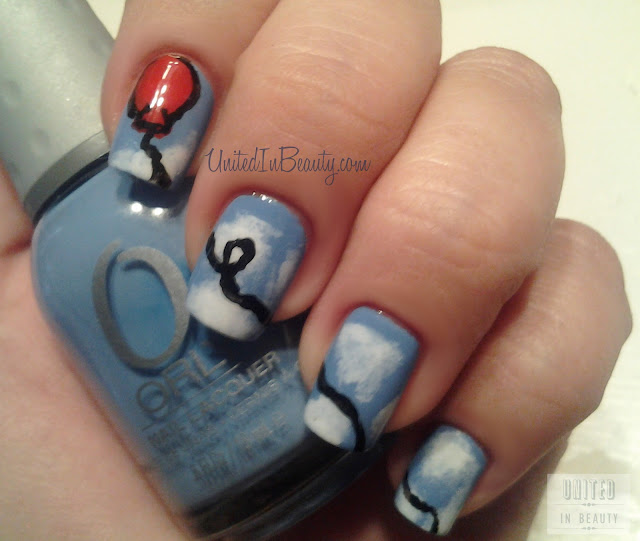
My Balloon Gone Wild

I felt like today's theme needed a little bit of extra oomph after yesterday's plain colored mani, so here we are with my balloon in the sky look.

I started by painting all the nails with a Orly - Snowcone. After they were dry to the touch, I sponged on a few white clouds using China Glaze -Snow, and added the red balloon and black string with a bit of acrylic paint I had lying around.

As you can see, I need quite a bit of practice with my brushwork. Let's just use our imaginations and pretend it's not all funky looking, alright? Pretty please?

Red balloon
Red balloon
Polishes used: Orly-Snowcone, China Glaze-Snow
To give you a few different views of the colors, the first picture was taken outdoors in direct sunlight and picture two was taken indoors.


SHARE:

January 22, 2013

31 Day Challenge - Day 02: Orange

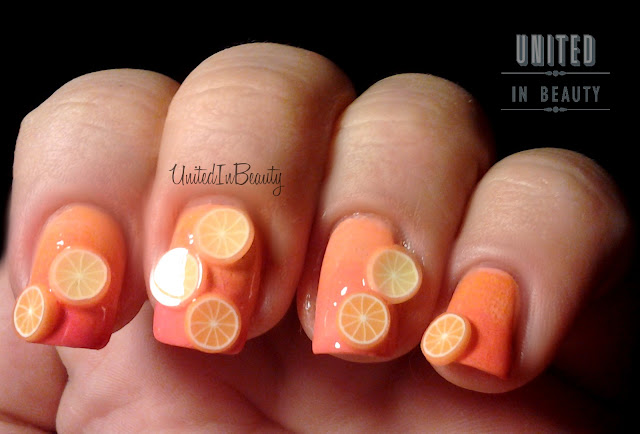
Orange Gradient Topped Off With 3d Fruit Slices

The theme of the day is orange, and what better way to represent than with a bit of fruit on my nails? I started out by painting the entire nail in China Glaze Peachy Keen, then used the sponge technique to create a gradient by adding in CG Papaya Punch and High Hopes. 

Once dry, I dipped a dotting dool in topcoat and used the tip to pick up the orange slices and place them randomly on each nail. Finished with Seche Vite and viola, here we have day 2!

Fruit-salad.jpg

Fruit-salad.jpg

Fruit-salad.jpg
 
Fruit-salad.jpg
Polishes used: China Glaze Peachy Keen, Papaya Punch, and High Hopes


SHARE:

January 16, 2013

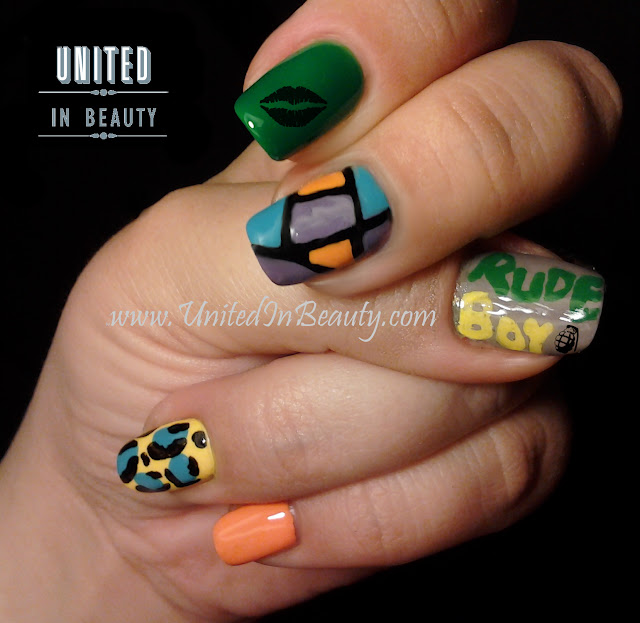
Rihanna "Rude Boy" Inspired Manicure

 "C'mere rude boy, boy..."

What else can I say? 
Well, I definitely have to say that I am FEELING this Rihanna "Rude Boy" inspired nail design HARD today. Looks like if you're in a polishing slump a little RiRi can work wonders! 


Here's a few images from the video that sparked my inspiration:


Rihanna Rude Boy Inspired Manicure
Rihanna Rude Boy Manicure
Rihanna Rude Boy Inspired Manicure


Polishes used : 
China Glaze - Papaya Punch
China Glaze - Happy Go Lucky 
KleanColor - Neon Green
O.P.I - Planks a Lot
O.P.I - French Quarter For Your Thoughts
Ruby Kisses - Teal Envy

If you haven't seen it yet, check out the video (I'll warn you though, it's catchy!)

What do you think, would this manicure do Rihanna proud? Any songs you'd like to see manicure-ized?
SHARE:
© United In Beauty. All rights reserved.
Blogger Template by pipdig