Trending

Showing posts with label glitter. Show all posts

December 31, 2014

Blue and Silver Glitter Gradient Nail Art

Blue and silver glitter gradient by @unitedinbeauty
Omg, WHAT? New Years Eve BONUS POST! Bet you never saw this comin' did you?! I've still got a few tricks up my sleeve now and again. ;) So, in typical fashion if you know me at all you know that I just couldn't ring in the new year without bling and glitter all over my fingertips and hence here we are again!
Blue and silver glitter gradient by @unitedinbeauty
As you may have guessed, the gorgeous blue polish is still Gilty Girl's Brilliant. This polish has been putting in work lately, I've used it so many times since I got it! For the bling, I created the glitter gradient by using a sparkly little gem of a polish called Frost Yourself that I picked up from Icing in the mall. To create the gradient, use the nail polish brush to apply the glitter at the base of the nails, then drag it lightly towards the tips. It's one of my favorite ways to fancy up a manicure because it's so quick and easy! There we have it folks, that's a wrap on 2014! See you on the other side!

Do you have any New Years Eve traditions that you like to follow? I'm off to the casino tonight, wish me luck! I'll need it!
SHARE:

December 16, 2014

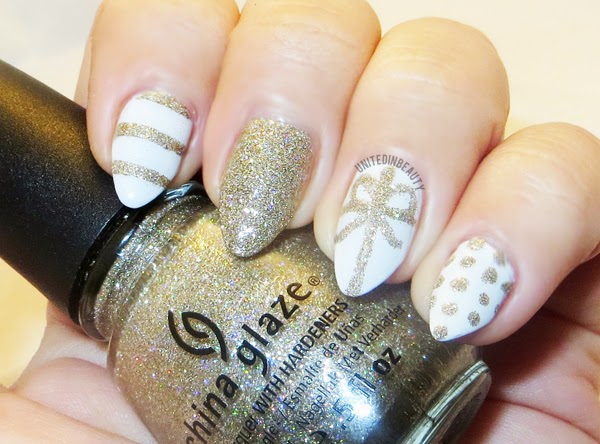
Gold Sparkles with Glittery Bow Accent Nail - 12 Days of Christmas Holiday Manicure Series Day 5

Christmas Present Nails
I've never been a huge fan of gold, but lately I can't seem to get enough of it! This manicure is quick and easy and got a lot of compliments today, which is always a plus, right? I think I may have to bust it out again once it comes time for Christmas parties!
Christmas Present Nails
I started with 3 coats of OPI - My Boyfriend Scales Walls, which I have found to be the perfect off white shade. I've searched high and low for a white that is not too stark, but not too yellow and so far this seems to be it. After that was completely dry, I used striping tape to create the lines on my index finger, and a medium sized dotting tool to make the polka dots on my pinky.
Christmas Present Nails

Maybelline Color Show Jewels Gilded in Gold

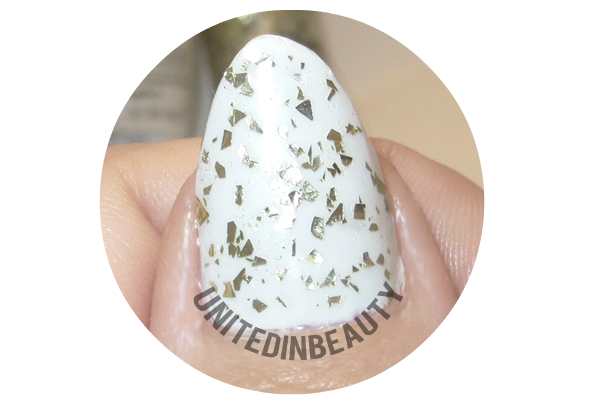
I decided to go full on bling for the middle finger, and used a small nail art brush to draw in the bow accent on my ring finger. Since it was a bit difficult to see in the other photos, I took a close up of my thumbnail and the gold flakes. On my thumb, I used one good coat of Maybelline Color Show Jewels in Gilded in Gold. Well folks, that's it for day 5! See you tomorrow!

How are you all enjoying the 12 days of Christmas Manicures so far? Are there any looks you like to see me create?
SHARE:

December 11, 2014

Glitter Bomb Stilettos - OPI Get Your Number


It's December, which means every weekend is GO GO GO!  In a rush but desperate for a new mani, I decided I needed something simple but eye catching and decided to break out my OPI - Get Your Number from their Liquid Sand collection. 


This is seriously a glitter bomb in a bottle and I couldn't love it more! This is two coats of Get Your Number and one coat of Seche Vite. If you are not familiar, the Liquid Sand collection features glittery matte textured polishes that are gorgeous on their own, but I've found that a nice coat of Seche Vite really takes the sparkle up a notch.

Now that I've got it on my nails, I feel a Christmas stamping manicure coming, so stay tuned!

Share your thoughts about OPI Get Your Number below. Have you tried using textured polishes yet?
SHARE:

February 7, 2013

31 Day Challenge - Day 18: Half Moons

- Gray on Gold Half Moon Manicure -

I am loving today's look
The half moon manicure has been increasing in popularity lately, so I'm happy to hop aboard the love train! I went for a high contrast look by using a medium shade of gray and a bright gold glitter for this design.
Polishes used: China Glaze - Recycle & I'm Not Lion


The great thing about this design is that you can use reinforcement labels as a guide to create the perfect half circle on the nail base. 

After the base coat of polish is dry (in this case the glitter polish) place one of the stickers so that the outside round edge forms the guide for the half circle.

Paint over the sticker, and remove while still tacky/wet for a nice clean line. Tada!
SHARE:

February 6, 2013

31 Day Challenge - Day 17: Glitter

- Silver Glitter Gradient -
Today I come to you with a heavy heart, and a slightly lighter hand. You may notice that my nails are looking a little bit nubbier than usual today... (If you noticed this, kudos to you... You may just be my biggest fan!) Let's just say I had an unfortunate grocery unloading accident that is much, much too painful and gory to talk about. I will spare you the details, and only say that many delicious cookies, and a few nail tips perished as a result... 
A moment of silence please...
Polishes used: WetNWild  - Silvivor &  Essie - Set In Stones
On the bright side, this silver glitter gradient helped me forget my sorrows!
If you have never attempted a glitter gradient, let me tell you that it is a lot easier than you think! 

After a quick swipe of clear base coat, I started by painting just the tips of my nails with Silvivor, then used the brush to drag a small amount of the polish down towards the base of the nail. 

When dry, I applied Essie's Set In Stones and used the same dragging technique to pull the polish towards the nail base, creating the gradient effect.

Finished with a thick coat of Seche Vite, we have today's glitter challenge complete! 


SHARE:

January 29, 2013

Indie Alert - Carnival In Rio by KraftyGurlDesigns

- Birthday Party of 5 -

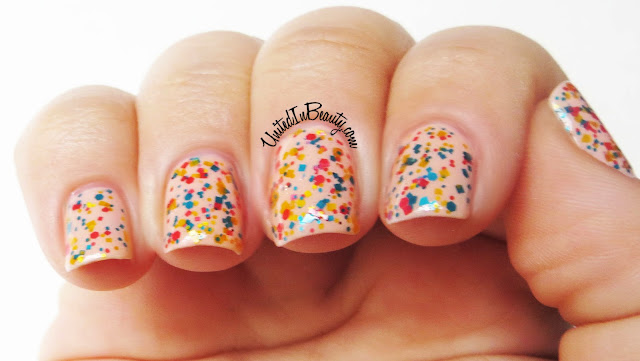
If my fingernails were celebrating a birthday, this is definitely what they would wear for their big night out on the town. I feel like confetti just fell from the sky and landed perfectly in all the right spots with this Indie polish from KraftyGurlDesigns. It's a party on my hands and you're invited!

Carnival-in-Rio

Carnival-in-Rio
1 coat of Carnival In Rio over Essie - A Crewed Interest

Carnival in Rio by KraftyGurlDesigns is a mix of yellow, teal, and hot pink glitters suspended in a clear base. I found that the glitters were super easy to place as desired just by manipulating the brush strokes, which is important if you are anything like me and find that you are super particular about the placement of glitter on each of your fingernails. 

The colors are bright and vibrant, and the glitter is solvent resistant so there is no risk of bleeding or fading either. I layered the glitter over Essie's A Crewed Interest, but in my opinion this glitter would also look fantastic and really pop with a black or white base. I just love it!

Carnival In Rio retails for $6.50 and is available through KraftyGurlDesigns on Etsy


SHARE:

January 26, 2013

31 Day Challenge - Day 06: Violet

 -A Little Bit Of Purple Passion For Zoya Aurora-

By my own admission, I have never been a huge fan of violets or purples in general, so in all honesty I was not entirely looking forward to the color of today's challenge. (I know, I know...Please direct all hate mail to IhateUnitedInBeauty@thisemailisfake.com) 

I'll understand if you feel the need to make a voodoo doll with my name on it after reading that confession. If there is one thing I've learned in my 30 years on this colorful Earth it's that people are passionate about their purples.

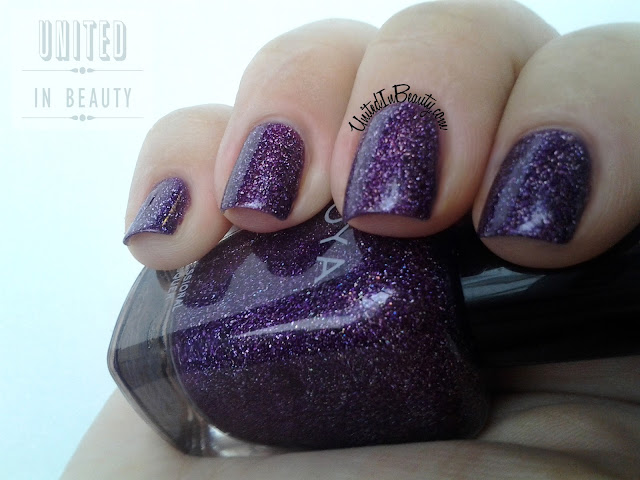
If you're still reading, I have great news! There's no need to track me down and cover me in purple paint in a fit of rage! Luckily, my Zoya haul from the 2013 promotion arrived in my mailbox today, and included was Aurora - an intensely sparkly and holographic wonder of a polish - perfect for today's theme! I think these pictures speak for themselves:

Zoya Aurora
Zoya Aurora
SHARE:
© United In Beauty. All rights reserved.
Blogger Template by pipdig