Trending

Showing posts with label Christmas. Show all posts

December 23, 2014

White & Gold Flakes with Handpainted Ornament - 12 Days of Christmas Holiday Manicures Day 12

White & Gold Nails with Handpainted Ornament by @unitedinbeauty
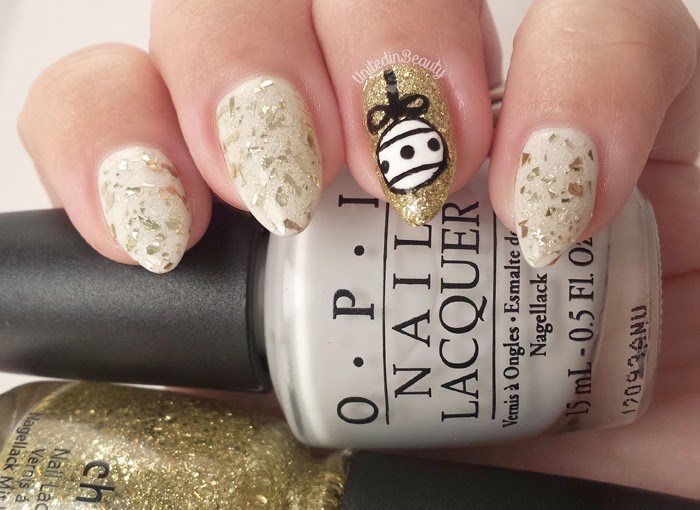
It's the final day of Christmas manicures, can you even believe it? It feels like it went by so fast,  I  have so many more ideas! I either need more days until Christmas, or more nails...  I started with a base of OPI- My Boyfriend Scales Walls, then I decided to go out with a bang today and break out both my handpainting nail art skills AND 18k gold topcoat for this one. I'm so faaaancy!
White & Gold Nails with Handpainted Ornament by @unitedinbeauty
Polishes used: OPI- My Boyfriend Scales Walls & Mariah Carey Pure, China Glaze - Blonde Bombshell, Seche Vite Topcoat   
While I do love the OPI - Mariah Carey Pure 18k gold flake topcoat, I have to admit that the flakes are quite small, which is a bit of a disappointment. It seems like every time I use it I always end up wanting more. The other day while I was out and about, I spotted  Maybelline Color Show Jewels - Gilded in Gold and I just couldn't resist picking it up. These flakes are much bigger, and are exactly what I was hoping for out of the OPI topcoat. By layering both of these polishes, I got exactly the look I was going for.

For maximum blingage, I added a gold accent nail using China Glaze - Blonde Bombshell and used acrylic paint for the hand painted ornament. I gotta admit, the ornament turned out way cuter than I thought it was going to, I'm pleasantly surprised! A nice coat of Seche Vite added so much shine to these it's insane. Can't wait to wear them to my family Christmas party! Well that's a wrap on my 12 Days of Christmas manicures, I hope you enjoyed it as much as I did! In other news, I'm considering trying out video tutorials for my nail art, but I'm honestly just not even sure where to begin,. Let me know down below if you have any tips or tricks for getting started!

What do you think of these gold flakey nails, just enough bling or too over the top?
SHARE:

December 22, 2014

Elegant Red and Gold Ruffian Nails - 12 Days of Christmas Holiday Manicures Day 11

red and gold ruffian nails by @unitedinbeauty
I seriously can't get enough of the sparkles this week, I am obsessed! Is this where I'm supposed to put #sorrynotsorry? There's not too much to say about this one, I think the look really speaks for itself!
red and gold ruffian nails by @unitedinbeauty

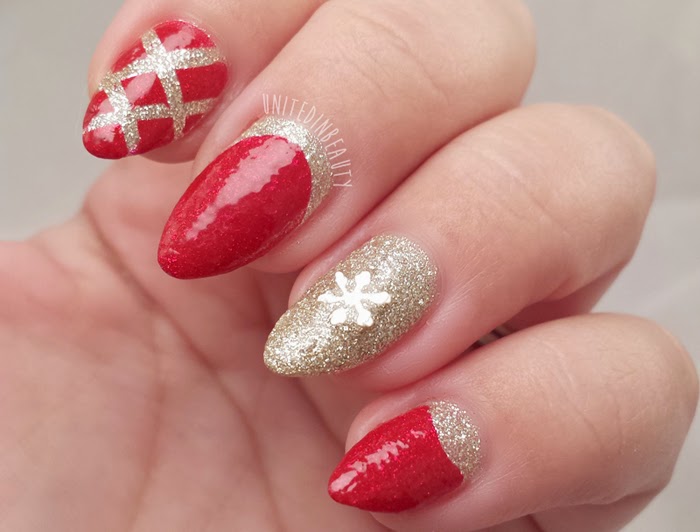
I started out with 2 coats of OPI - My Favorite Ornament, then I used one of my absolute favorite reds for this manicure. The red polish is called Red Cameo by Ruby Kisses. It's not from a hugely popular brand but I will say that it is highly underrated! I got a pleasant surprise today when I realized that the red is slightly jelly and allowed the glitter polish to shine through which made this even more awesome in my opinion.
red and gold ruffian nails by @unitedinbeauty
I used striping tape in a criss-cross pattern to create the look for my index finger and added a tiny snowflake to my ring finger to give this a wintery touch. That's it for today, see you tomorrow!
SHARE:

December 21, 2014

Green Holograpic Nail Stamped With Ivy - 12 Days of Christmas Holiday Manicures Day 10

Green Holograpic Nail Stamped With Ivy
If you've got a keen eye, then you just might recognize this green holographic polish from day eight's design, if you did - good sleuthing! I mentioned I was going to start using my stamping tools more often, so before I wiped that gorgeous polish away I just could not resist stamping over it to give it a different look first.
Green Holograpic Nail Stamped With Ivy

I hadn't planned on using this for one of my 12 days of Holiday manicures, but what the hey, life's short. I love the ivy design and this stamping plate worked awesome. It gave me no troubles whatsoever, it's a Christmas miracle!

This is the same 3 coats of Color Club - Holiday Splendor stamped with the Pueen 55 plate. I used my Konad stamper and white Konad polish again, because hey if it ain't broke don't fix it, right? If you are rocking a polish and you want to freshen it up, try stamping over it. Seriously it changes everything and who cares if it's yesterday's polish? Ain't no shame in our polish game!
SHARE:

December 20, 2014

Candy Cane Striped Nail Art - 12 Days of Christmas Holiday Manicures Day 9

Christmas Candy Cane Nails by @UnitedinBeauty
Now you didn't think I was going to make it all the way through my Christmas designs without first representing my favorite holiday candy, did you? If you couldn't tell right off the bat, my favorite treats of the season are the delicious, old fashioned red and white striped peppermint candy canes. Just looking at my nails right now is making me hungry, YUM!
I painted my nails white first and once completely dry, I used striping tape to create the lines. Once I got all my tape in place, one quick swipe of my favorite glittery red polish Chine Glaze - Ruby Pumps did the trick. PRO TIP: Be sure to pull the striping tape off quickly while the polish is still wet in order to get neat and crisp lines!

If you recreate this or are inspired by any of my other manicures please be sure to add the hashtag #HeyUnitedinBeauty so I can see your awesome work!


SHARE:

December 19, 2014

Color Club Holiday Splendor - 12 Days of Christmas Holiday Manicures Day 8

Color Club Holiday Splendor
Ho-Ho-Holy Holographic Polish, Batman! I am losing my mind today over this amazing sparkly holographic green, Color Club Holiday Spendor is seriously just so much yes in a bottle. SO. MUCH. YES. I was tempted to ramp up the nail art again today while I was still  riding on yesterday's stamping high, but I just couldn't bring myself to cover up the natural amazingness that is this polish.
Color Club Holiday Splendor
I've been dying to get my hands on this polish for the longest, and just like a Christmas miracle, my dreams have come true! I must have been a very good girl this year, or very good at hiding from Santa - could go either way... This is 2 coats of Color Club Holiday Splendor topped with my go-to topcoat, Seche Vite. I added the gemstones just for a little extra somethin' somethin.
Color Club Holiday Splendor
I honestly wish I could get my camera to take it all in, these photographs really don't even do this polish justice. It is so much more sparkly in real life, take my word for it. If you spot this little gem, better grab it up because I think before long this will be one of those ever coveted holos that become the stuff of legends.

Snag the look:
Color Club - Holiday Splendor
Seche Vite Fast Dry Topcoat
Nail Art Gemstones

Is all this holographic goodness striking your fancy? Share your favorite holo polish, I'm always on the hunt for more!
SHARE:

December 18, 2014

Ugly Christmas Sweater Nails - 12 Days of Christmas Holiday Manicures Day 7

Ugly Christmas Sweater Nails
Hold on to your stockings people, if you thought ugly Christmas sweaters were only for holiday parties at Grandma's house, better chickity-check yo self because they have found quite a cozy home right here on my fingertips too. Ho-Ho-HOLLA if ya hear me!
Ugly Christmas Sweater Nails
What started out as a fun idea quickly turned into a not-so-gentle reminder that my stamping skills need some serious work. There will definitely be more stamping to come in the future, just so I can practice up if nothing else. The base for these nails is 3 coats of Zoya Dove. I could have gotten away with 2 coats, but as always I felt the need to overdo it.
The sweater pattern was done using white Konad stamping polish and stamping plate 38 from Pueen. The stamping plate I used for the accent nail is Pueen 63, my first time using both of them and I was pleasantly surprised with the quality. My pink Konad stamper picked up everything without any trouble at all, but my white soft "marshmellow" stamper just wasn't havin' any of it today. I now realize the stamper holds all the power, lesson learned. I gotta admit, I kind of love this manicure. Bummer it's got to come off for tomorrow's look!
 
                                                             Snag the Look:
Zoya - Dove
Konad White Stamping Polish
Pueen Stamping Plate Collection (Including 38)
Pueen Stamping Plate Collection (Including 63)
Seche Vite Fast Dry Top Coat

Are these ugly Christmas sweaters a hit or a miss for you guys? What do you say?
SHARE:

December 17, 2014

Red and Green Christmas Polka Dots Dotticure - 12 Days of Christmas Holiday Manicure Series Day 6


Red and green Christmas dotticure
I've gotten a few requests to come up with a Christmas-y themed manicure for beginners, and that's exactly what I've got for you today! This is a look that anyone can do, and best of all is that it doesn't even require any special tools. If you've got a bobby pin, a toothpick, or even a makeup brush laying around then you've got all you need for this red and green holiday dotticure. 

My camera wasn't cooperating with me today, or I would have grabbed a few more photos for you, alas we must work with what we've got, right? BTW, if you follow me over on Instagram, thanks for all the birthday wishes yesterday! You guys are the best! 


Red and green Christmas dotticure
Polishes used: China Glaze - Dandy Lyin' Around, OPI - Don't Mess with OPI, Ruby Kisses - Red Cameo
First I started with 2 coats of China Glaze - Dandy Lyin' Around (which has a beautiful sheen that my camera somehow refused to pick up) and let that dry.Next I used my medium sized dotting tool to create the red and green dots all over the nails in random spots. If you do not have an actual dotting tool, no biggie! Just use the end of a bobby pin, a toothpick, or the end of a makeup brush and dip it in the polish. Use a light hand and dab the dots onto the nail and with a little practice you'll get perfect circles. 

Let the dots dry completely before adding your top coat, even if it's Seche Vite. I cannot stress this enough, I repeat, let the dots dry! Take it from me... Seriously, if not you'll get some gnarly streaking and it will ruin your manicure, and possibly your day. Once you are complete dry, add your top coat and you've got the finished look!
SHARE:

December 16, 2014

Gold Sparkles with Glittery Bow Accent Nail - 12 Days of Christmas Holiday Manicure Series Day 5

Christmas Present Nails
I've never been a huge fan of gold, but lately I can't seem to get enough of it! This manicure is quick and easy and got a lot of compliments today, which is always a plus, right? I think I may have to bust it out again once it comes time for Christmas parties!
Christmas Present Nails
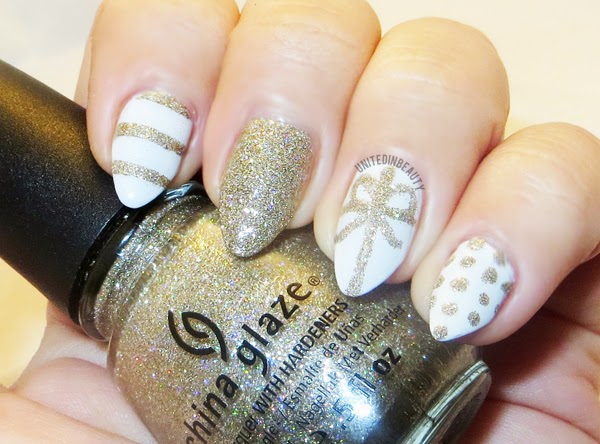
I started with 3 coats of OPI - My Boyfriend Scales Walls, which I have found to be the perfect off white shade. I've searched high and low for a white that is not too stark, but not too yellow and so far this seems to be it. After that was completely dry, I used striping tape to create the lines on my index finger, and a medium sized dotting tool to make the polka dots on my pinky.
Christmas Present Nails

Maybelline Color Show Jewels Gilded in Gold

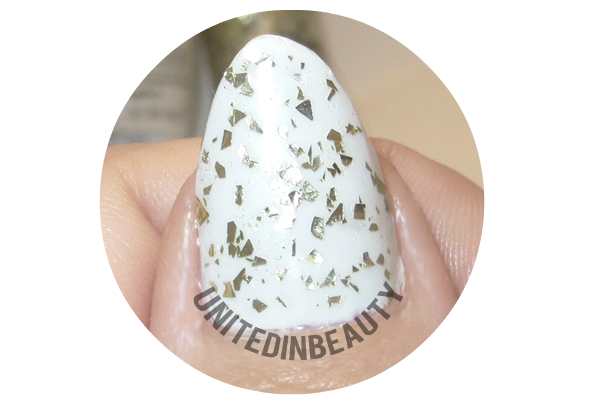
I decided to go full on bling for the middle finger, and used a small nail art brush to draw in the bow accent on my ring finger. Since it was a bit difficult to see in the other photos, I took a close up of my thumbnail and the gold flakes. On my thumb, I used one good coat of Maybelline Color Show Jewels in Gilded in Gold. Well folks, that's it for day 5! See you tomorrow!

How are you all enjoying the 12 days of Christmas Manicures so far? Are there any looks you like to see me create?
SHARE:

December 15, 2014

Winter Snowflakes - 12 Days of Christmas Holiday Manicure Series Day 4

KBshimmer Snowflake Nails


Here we are on day 4 and I just couldn't resist using another one of the gorgeous KBShimmer polishes that came in the mail today as the base for this fun snowflake manicure. I'm not a fan of the cold weather at all,  but I don't mind it when it looks this good on my nails!
KBshimmer Snowflake Nails
Just to be sure that the base was complete opaque, I used 3 coats of KBShimmer - Snow way then hand painted the snowflakes using a basic white acrylic paint that I had laying around. This was my first time painting snowflakes, so they could use a bit of work, but bear with me. Since I needed a little extra something, I added the two gemstones to my ring and pointer fingers and gave everything a nice coat of Seche Vite to finish them off. I love this look!


SHARE:

December 14, 2014

12 Days of Christmas Holiday Manicure Series Day 3 - Glitter Gradient and Christmas Tree Accent

Christmas Tree Nail Art

Welcome to day 3 of the 12 Day of Christmas Holiday Manicure Series! Whew, that's a mouthful, isn't it? After yesterday's jelly sandwich, I was itching to bust out my nail art brushes and do some work, hence this red and green glitter gradient with sparkly Christmas tree was born.
Christmas Tree Nail Art


The base polish is 3 coats of OPI - My Vampire is Buff, which is a gorgeous creamy nude color. Two coats probably would have been sufficient, but I added another just to be sure that it was completely opaque before starting in with the glitter gradient. 


Christmas Tree Nail Art


Christmas Tree Nail Art


I used striping tape to get the crisp lines in the tiny Christmas tree and added silver balls and a tiny silver star on top for the finishing touch. I dabbed a bit of white flocking powder over white nail polish to create the snowy ground, I'm super bummed that the camera didn't pick up the fact that the snow is fluffy and 3D! Overall, I'm pretty pleased with how this turned out. Stay tuned for day 4!

Polishes Used: OPI - My Vampire is Buff
                         China Glaze - Twinkle Lights
                         China Glaze - Mistletoe Kisses
SHARE:

December 13, 2014

12 Days of Christmas Holiday Manicure Series Day 2 - Holly Back Girl by KBShimmer


Today is the 2nd day of my 12 days of Christmas manicures! I know nail art isn't for everybody, so for day 2 I wanted to include this milky jelly sandwich in a bottle by the lovely KBShimmer. If you are looking for something festive and fast, this is a great choice. This is 3 coats of Holly Back Girl topped with Seche Vite.


I did my best to get a good macro photo to show off all the goodness that is hiding in this bottle. There is a nice off white milky base with different sizes of red and green hexagon shaped glitters mixed in. There is so much depth to this once it is applied that is hard to capture on camera.

I considered adding just a bit of an accent nail since it's so hard to resist but I really think this polish shines best on its own. Let the sparkle do the work for you!

Share your thoughts about KBShimmer Holly Back Girl below. Are you a fan?
SHARE:

December 12, 2014

12 Days of Christmas Holiday Manicure Series Day 1 - Red Glittery Santa Hat Tips

Today marks the start of my 12 days of Christmas Holiday manicure series and what better way to start off with a bang than with these adorable Santa hats on my nail tips? For the next 12 days leading up to Christmas I'll be showing you a new holiday themed design. Turns out my new stiletto nail shape came in quite handy for this one. NO REGRETS!

I love that these are festive without being overdone, and on the plus side they are really easy to do. The Santa hats were completely painted freehand with a small art brush. I started by creating just a basic french tip. Once that was fully dry, I used a white polish and a dotting tool to make the fluffy base of the hat. To finish them off, I painted a few swipes of Ruby Pumps again to make the rest of the hat and added a clear gem. Voila!


This design really is perfect for the stiletto shape, but can be done on any nails. If you have square or squoval nails, just make the base of the hat on your nail tip with the point going towards the cuticle and it'll turn out great.

Share your thoughts about Santa hat nail tips. What's your favorite holiday nail design?
SHARE:
© United In Beauty. All rights reserved.
Blogger Template by pipdig