Trending

Showing posts with label Gradient. Show all posts

October 26, 2013

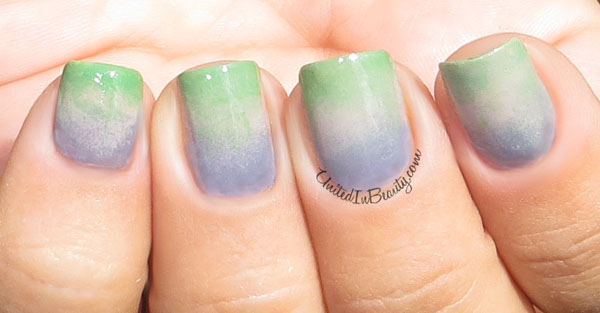
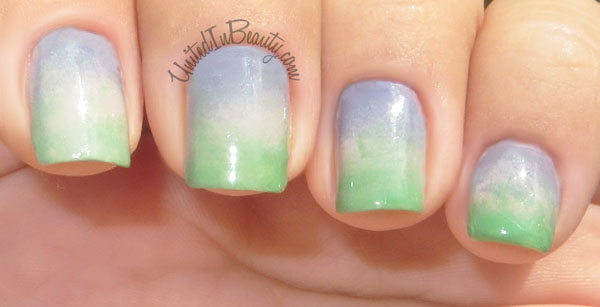
Gradient Nail Art With Zoya Rafael Cennamo Spring/Summer 2013 Collection

Today I was feeling inspired by the soft color palate of the gorgeous Zoya Rafael Cennamo Spring/Summer 2013 Collection and thought that they would look amazing together. This pretty gradient nail art was done using three of the nail polishes from the new collection. I really love the way the gradient came out, the finished look almost reminds me of a soft watercolor painting.

Gradient Nail Art

In order to create this look, I used three different Zoya polishes and sponged them on to my nail to create the faded gradient design. Zoya Caitlin is at the base of the nail, Zoya Kennedy is in the middle, and Zoya Wednesday is sponged on the tips.


Gradient Nail Art

When using the sponged gradient technique it is common for the result to look a bit thick with noticeable lines of division between color until a top coat is applied, so don't spaz out if you try it and notice it doesn't quite look right yet. No need to freak your freak! I personally almost always use a coat of Seche Vite to smooth out the polish and top off my nails with a glossy finish. 


If you are going to be trying a sponged gradient, you also will want to always keep the sponge damp in order to get the smoothest color blend. I let mine sit in a small cup of water until I am ready to use it. Gradients are so fun! I'd love to hear about your gradients too, what are your favorite colors/polishes to blend together?

SHARE:

February 6, 2013

31 Day Challenge - Day 17: Glitter

- Silver Glitter Gradient -
Today I come to you with a heavy heart, and a slightly lighter hand. You may notice that my nails are looking a little bit nubbier than usual today... (If you noticed this, kudos to you... You may just be my biggest fan!) Let's just say I had an unfortunate grocery unloading accident that is much, much too painful and gory to talk about. I will spare you the details, and only say that many delicious cookies, and a few nail tips perished as a result... 
A moment of silence please...
Polishes used: WetNWild  - Silvivor &  Essie - Set In Stones
On the bright side, this silver glitter gradient helped me forget my sorrows!
If you have never attempted a glitter gradient, let me tell you that it is a lot easier than you think! 

After a quick swipe of clear base coat, I started by painting just the tips of my nails with Silvivor, then used the brush to drag a small amount of the polish down towards the base of the nail. 

When dry, I applied Essie's Set In Stones and used the same dragging technique to pull the polish towards the nail base, creating the gradient effect.

Finished with a thick coat of Seche Vite, we have today's glitter challenge complete! 


SHARE:

January 30, 2013

31 Day Challenge - Day 10: Gradient Technique


 - Bam! Take THAT, super difficult gradient technique! IN YO FACE! -

For today's challenge I revisited one of my favorite looks with this blue to purple gradient. As much as I love this look, I'm always a little anxious when it comes time to paint. 

This technique can be tricky, polish that is too thick can create strong lines instead of the faded look, and polish that is too thin causes the two colors to overblend. This means a lot of trial and error when it comes to picking out the right polishes, but I have found that the two China Glaze polishes For Audrey and Beach Cruise-r play together very nicely to create a perfect fade!

China Glaze For Audrey
China Glaze - Beach Cruise-R
Polishes used: China Glaze - For Audrey and Beach Cruise-R, O.P.I - Pirouette My Whistle

If you are going to be trying this technique, I do have a few tips to help you along the way:

First, use wax paper to pre-mix your colors. Paint a strip of each color side by side, then use a dotting tool or toothpick to mix them slightly in the middle. 

Next, wet a makeup wedge and ring it out, leaving it damp. Dip the wedge in the polish on the wax paper and pat straight down on the nail, moving up and down slightly. 

Repeat as necessary and finish with a quick dry top coat. 
Once you add the top coat, you will notice how well the colors will blend together!


SHARE:
© United In Beauty. All rights reserved.
Blogger Template by pipdig