Trending

Showing posts with label Orly. Show all posts

January 11, 2015

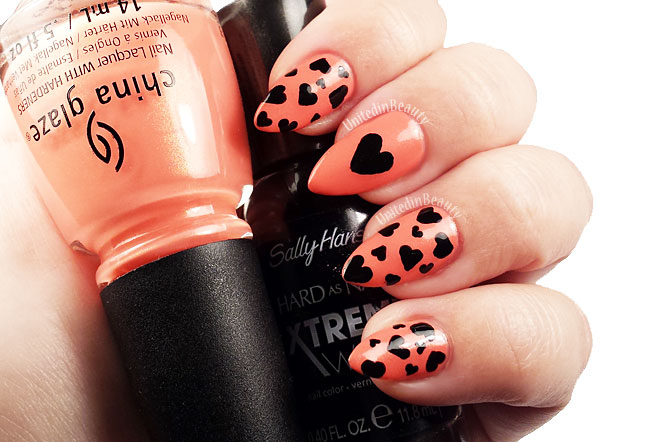
China Glaze Mimosas Before Manis - Coral and Black Hearts Nail Art


China Glaze Mimosa Before Manis by @unitedinbeauty

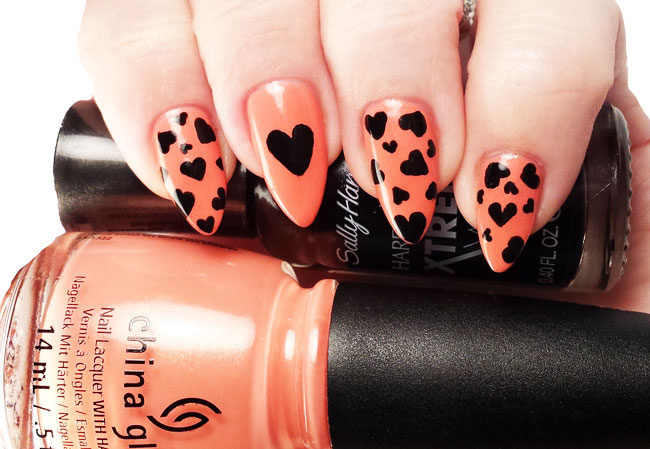
Happy Sunday everyone! I know we're a little over a month away from Valentine's Day, but I picked up this adorable new coral shirt with black hearts the other day and it totally inspired me. I just couldn't resist recreating it on my nails too! It might be a bit early, but I suppose there's never a wrong time for hearts! Besides, soon enough we will all be bombarded with thousands of Valentine's Day heart manicures and there's nothing wrong with being the early bird, is there? After all, they do get the pleasure of eating worms, lucky them! -_-

China Glaze Mimosa Before Manis by @unitedinbeauty
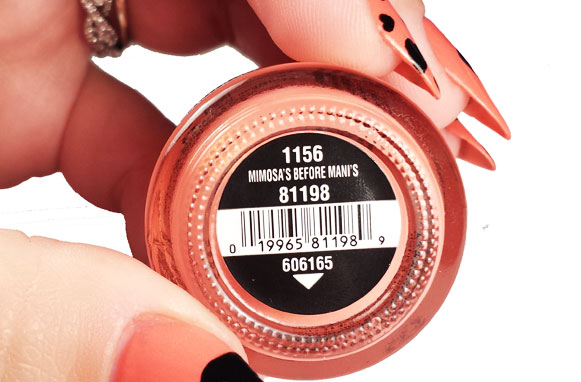
The base polish that I used is two coats of China Glaze Mimosa's Before Mani's. Before I get into the rest of the details, I just have to say that man, typing out those grammatical errors HURT. China Glaze, You got some splanin' to do! Seriously though, take a good look at the next photo. See that? See those big glaring apostrophes that aren't supposed to be there? Believe it or not, the name of the polish really is printed like that. The first time that I saw it, I actually wondered if I received a badly counterfeit nail polish until good ole reliable Google showed me that they somehow meant to print them this way. Grammatically incorrect nail polish names? Can. Not. Deal. China Glaze - Fire whoever the head polish name printer is, and hire this girl right here. 'Nuff said.

China Glaze Mimosa Before Manis by @unitedinbeauty
Rant and horrible grammatical errors aside, let's get back to business. This polish is the bomb. It's an AMAZINGLY PERFECT peachy coral shade that has just a hint of a fabulous gold shimmer to it. My camera had some difficulty picking up the shimmer on my nails,  but if you take a good look at the bottle in my photos you'll be able to see it. I feel like I spent forever last summer trying to find a really great polish in this color. I must have about 10 different peach/pink/corals in my collection now, and I must admit that I love them all.
China Glaze Mimosa Before Manis by @unitedinbeauty
Once the Mimosa's Before Mani's was complete dry, I used my favorite black polish Orly Liquid Vinyl and one of the smallest detail brushes from my Royal and Langnickel RMAJ Detail Brush Set to hand paint the black hearts over top. I let the hearts dry completely to avoid streaking, then topped with Seche Vite Dry Fast Top Coat.

You may have noticed by now that my thumb is a bit camera shy, I often get asked on Instagram what is painted on my thumbnail so I figured today I'd share with you. For this look, my thumb is painted with a black heart on the tip just like the ones in these red heart tipped stiletto nails.

China Glaze Mimosa Before Manis by @unitedinbeauty
 - Polishes  Used -
  • China Glaze - Mimosa's Before Mani's
  • Orly - Liquid Vinyl
  • Seche Vite Dry Fast Topcoat
- Extras - 
  • Dotting Tools
  • Royal and - Langnickel RMAJ Detail Brush Set
I'm not sure if you'll be able to tell, but I've been working on trying to improve my nail photos lately, and I tried a different technique for all of the photos in this post. Can you see a difference? I'd love any tips, tricks or suggestions you might have for me! Did anyone else rage out at the grammatical errors on their Mimosa's Before Mani's polish bottle? As always, don't forget #HeyUnitedinBeauty if you recreate or are inspired. I'd love to see!
SHARE:

February 8, 2013

31 Day Challenge - Day 19: Galaxy Nails


- Glittery Galaxy Nails -

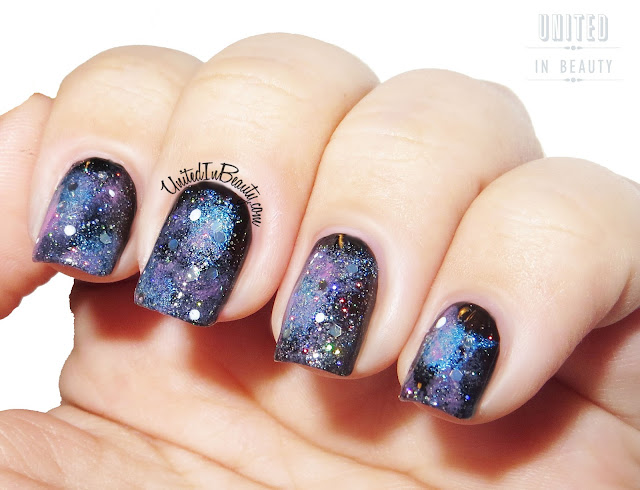
One of the best things about this ongoing challenge is all the new things that I am learning! I have always been a fan of Galaxy nails, but I honestly had no idea that they were so easy!
Galaxy Nails
Polishes used: Orly - Liquid Vinyl & Sweet Peacock, China Glaze - Laced Up, White On White, Fairy Dust & Techno, OPI - I Have A Herring Problem
This was spectacularly easy to create! The only additional tools I used to create this look were a makeup wedge and a small dotting tool.  

While I was working on this design, one of the things that I learned is that you will definitely have better luck with wet makeup wedge than with a dry one. If the sponge is too dry, you may end up with tiny sponge pieces on your nails, which are a pain to pick off! 

The first step is to paint the nails with one coat of black polish. Once dry, I used the wet makeup wedge to begin sponging on a very tiny amount of the blue polish in random areas.
 
There is no need to wait for the blue polish to dry, just go ahead and sponge on a tiny amount of lighter blue/gray polish over the first. You want to keep a light hand with this, or you will cover your original splotches. 

Now it's time to add the pink. You want barely any polish at all on your wet sponge for this, it's only meant to give your galaxy a hint of pink. 

Once all the polish is dry, it's time to add the sparkle. This is where the magic really happens, and each nail begins to look like a real galaxy! I used a very thin layer of fairy dust and was amazed at how good it looked. I also hand placed the glitter from Techo in random areas to look like bright stars in the night sky. I finished off by using my smallest dotting tool dipped in white polish to add one or two randomly placed VERY tiny dots to each nail, which gave a bit more dimension to the finished look.

Topped off with a nice coat of Seche Vite, I've got a super shiny galaxy on each nail! 
SHARE:

February 3, 2013

31 Day Challenge - Day 14: Flowers

- Pretty Little Garden -

Today's challenge sounds easy enough, just a few little flowers, right? Wrong. As usual, I managed to find a way to turn this into a fail. I though this would be the perfect opportunity to try out my new real dried flowers that I purchased from Ebay. Turns out, not so much...

Floral nails

Floral nails
Polishes used: Orly - Snowcone, China Glaze - Gaga For Green, Holly Day & Lemon Fizz
After a quick coat of Orly Snowcone, I used my smallest nail art brushes to start painting on the blades of grass in two different shades of green. Once dry, it was time to add the decorative flowers. 

As you can see, I quickly nixed the idea of working with the real flowers after they completely fell apart on my fingernails, leaving me with nothing but flower dust and a horrid memory of what had just happened. 

I had no choice but to grab my brushes again and go back to work. I'm no artist, so my flowers look a bit reminiscent of my kindergarten art projects, but they are on there none the less so I'm calling it goal. Day 14, all done!
SHARE:

January 27, 2013

31 Day Challenge - Day 07: Black & White

- High Contrast Sugar Spun Nails -

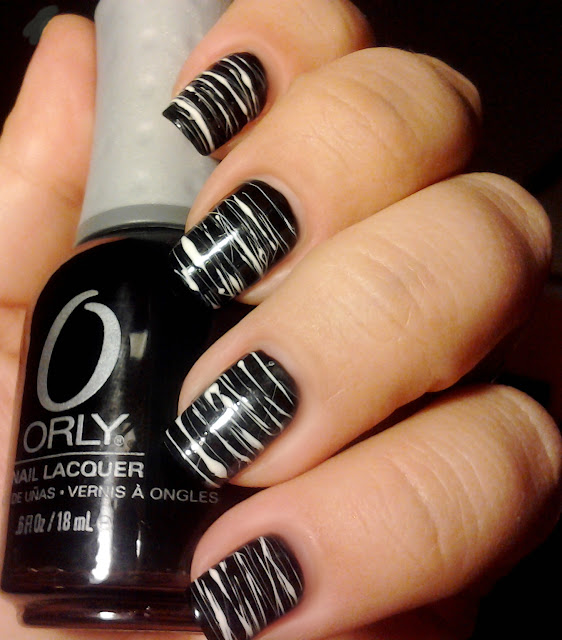
For the black and white theme, I decided to try a technique that is new to me. I've heard lots about sugar spun nails, and honestly thought they would be perfect for day 7. I love the way my nails seem to pop with the white on black.

China Glaze White On White

China Glaze White on White
Polishes used: China Glaze - White on White, Orly - Liquid Vinyl

Sugar spun nails consist of using a dotting tool or toothpick to drag very tiny strands of goopy polish from side to side across the fingernail, which makes it extremely time consuming, but the end result is well worth it. 

I quickly found that there is a bit of a learning curve with this one, it took a bit of trial and error to get the strands to be the right consistancy, but once I got the hang of it, it was smooth sailing from there!


SHARE:

January 25, 2013

31 Day Challenge - Day 05: Blue

My Balloon Gone Wild

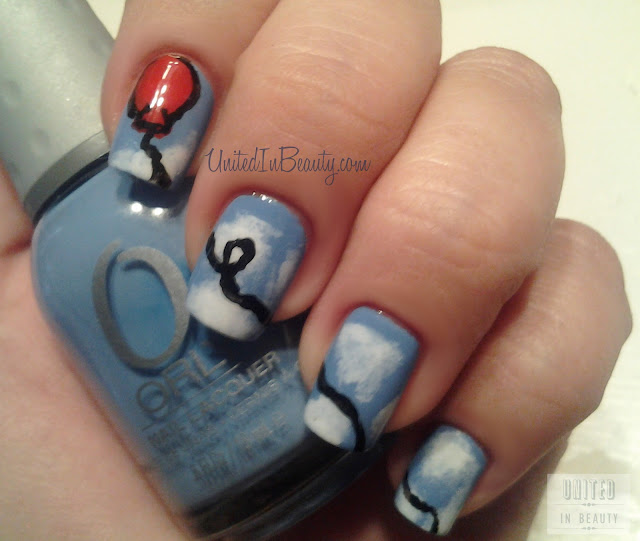
I felt like today's theme needed a little bit of extra oomph after yesterday's plain colored mani, so here we are with my balloon in the sky look.

I started by painting all the nails with a Orly - Snowcone. After they were dry to the touch, I sponged on a few white clouds using China Glaze -Snow, and added the red balloon and black string with a bit of acrylic paint I had lying around.

As you can see, I need quite a bit of practice with my brushwork. Let's just use our imaginations and pretend it's not all funky looking, alright? Pretty please?

Red balloon
Red balloon
Polishes used: Orly-Snowcone, China Glaze-Snow
To give you a few different views of the colors, the first picture was taken outdoors in direct sunlight and picture two was taken indoors.


SHARE:
© United In Beauty. All rights reserved.
Blogger Template by pipdig