Trending

January 6, 2015

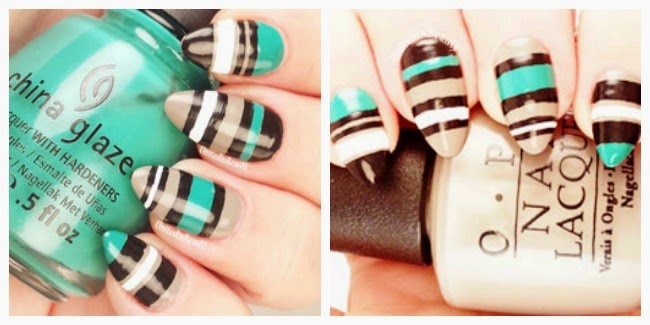
Freehand Green and Tan Striped Nails

Freehand striped nails by @unitedinbeauty
Today I've got a quick post for you with some fun green, black, white and tan striped nail art. These were done completely freehand using a set of very thin nail art brushes that I picked up from my local Hobby Lobby, but in retrospect I really wish I would have used some striping tape. It probably would have cut my time in half and I would have gotten much crisper lines. I guess what they say is true, hindsight is 20/20!

- Polishes  Used -
  •  OPI - French Quarter For Your Thoughts
  •  China Glaze - Four Leaf Clover & White on White
  • Orly - Liquid Vinyl  
  • Seche Vite Fast Dry Topcoat  
       
- Tools - 
  •   Royal & Langnickel - RMAJ Detail Brush Set 
Freehand striped nails by @unitedinbeauty
SHARE:

January 4, 2015

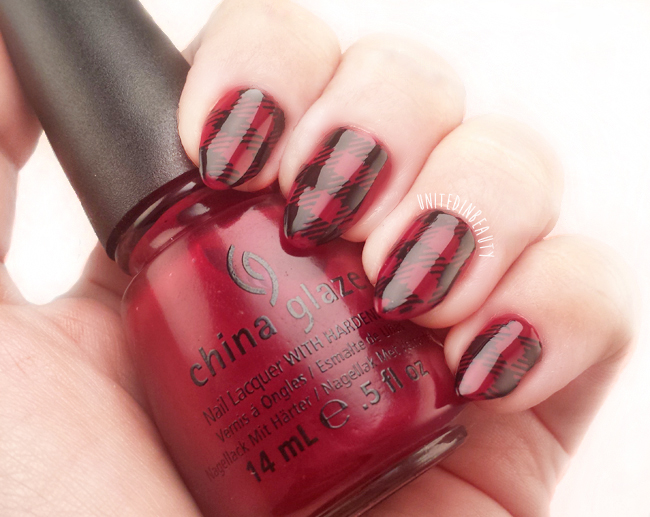
Red Plaid Flannel Shirt Nails


red plaid flannel shirt nails by @unitedinbeauty

This manicure is 100% inspired by my favorite outfit lately, a nice red flannel shirt, leggings and flats. I pretty much live in it these days, so my nails might as well match right? I'm sure everyone is just about partied out from all of the Christmas festivities over the next few days, and if I know one thing it's that when the holidays wind down it's finally time for me to relax - Hey a girl's gotta be comfy! I thought these red plaid flannel shirt nails would represent my favorite comfy outfit perfectly!
red plaid flannel shirt nails by @unitedinbeauty

I've been trying to work on my stamping skills, so this was another great opportunity. The base of my nails is 2 coats of China Glaze-Merry Berry, which I found to be thinner than other China Glaze polishes for some reason. Maybe I just got a funky bottle? If you've noticed this too, let me know down below in the comments. For the plaid pattern, I used the Mash-50 stamping plate, a squishy white "marshmellow" stamper, and black Konad polish.

It's a bit hard to pick up in the photos, because the stamping is subtle, but I really like the look of this design. It completely reminds me of being nice and warm, wrapped up in a cozy flannel shirt or blanket. Bring on the fuzzy feelings!

What's your favorite warm weather outfit? Are you a flannel or sweater kinda gal when it's cold outside? 
SHARE:

January 2, 2015

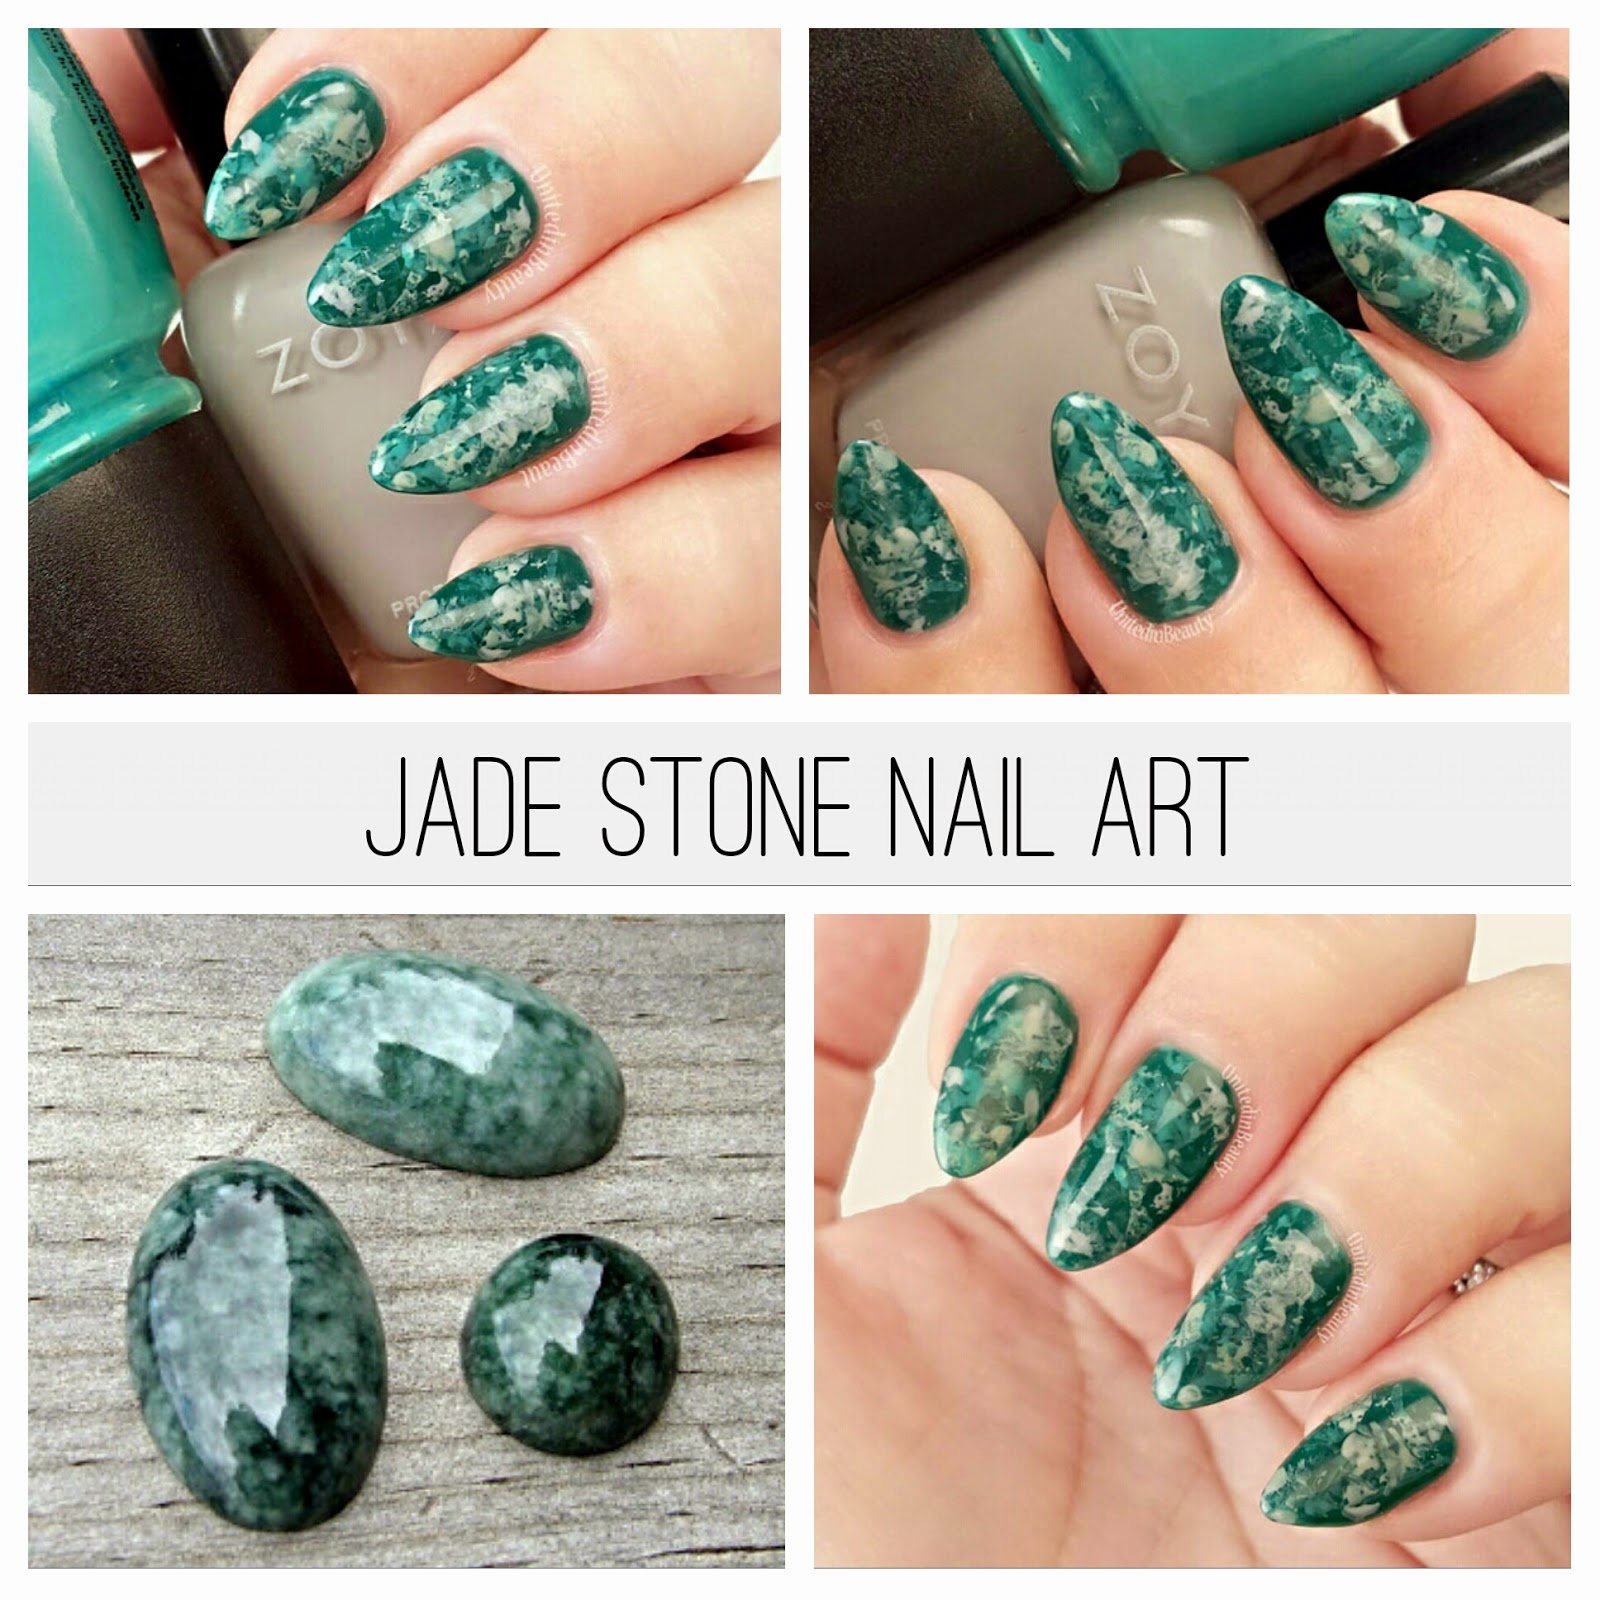
Jade Stone Marble Nails

jade stone marble nails by @unitedinbeauty
Welcome to 2015 everyone! Looks like we all made it, LOL! I've been feeling super inspired by jewelry lately, and I have this gorgeous Jade ring that has just been screaming out for me to recreate on my nails. All in all, I'd say that this is a pretty close match to a real jade stone!
- Polishes  Used -
  • Base Color: Gilty Girl - Jinx
  • Marble Effect: Zoya - Dove and China Glaze - Four Leaf Clover     
- Extras - 
  • Clear Plastic Cling Wrap
Step 1: Begin by applying 2 coats of Jinx by Gilty Girl and allow to dry completely. 
Step 2: Once dry, take a small bunched up piece of clear plastic cling wrap and dip it in a small amount of Zoya Dove. Dab the excess on a napkin, then use a very light hand to dab the polish on to your nails. 
Step 3: Allow the first layer to dry, then repeat the cling wrap process, this time using China Glaze Four Leaf Clover. 
Step 4: Once you are happy with the look of your jade stone marbled nails, apply a coat of Seche Vite Fast Dry Topcoat to mesh the colors together and seal the look.

I'm really into the look of stone nails right now. I might have to try turquoise nails soon, but man that spotted water marble sure is intimidating!

And there you have it! If you are inspired by or recreate this look, I'd love to see it! Use hashtag #HeyUnitedinBeauty on Instagram or send me a tweet on Twitter!

SHARE:

January 1, 2015

New Year, New Look! Announcing My New Blog Design

As you may have noticed, UnitedinBeauty recently got a makeover with the help of the awesome folks over at Pipdig.co! After having my old website theme for the past few years, I wanted something fresh and clean to start the new year off. I did a ton of research and talked with a lot of other beauty bloggers, and the one name that kept popping up among the blogospere was Pipdig. Just to refresh your memory, here's what the old design looked like.

Cute, but I felt like it had a bit of an amateurish feel to it. I love butterflies as much as the next gal, but they just didn't fit in here. Time for a real live grown up blog. I needed something sleek, sexy and sassy, which is no easy task. I found that Phil over at Pipdig was awesome to work with! He helped me to customize my design so that it was everything that I was looking for, and he even included installation for free. Bonus! I can't recommend him enough. If you are looking for a new design, go check out Pipdig and tell 'em I sent you!
SHARE:
© United In Beauty. All rights reserved.
Blogger Template by pipdig