Trending

October 26, 2013

Gradient Nail Art With Zoya Rafael Cennamo Spring/Summer 2013 Collection

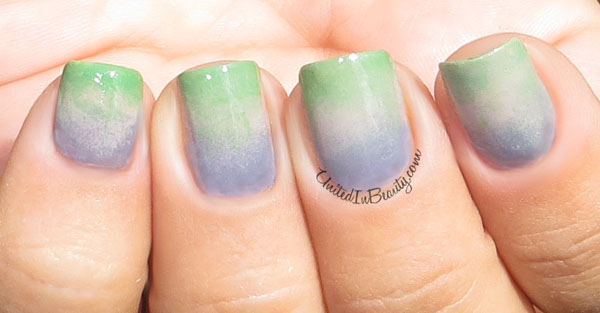
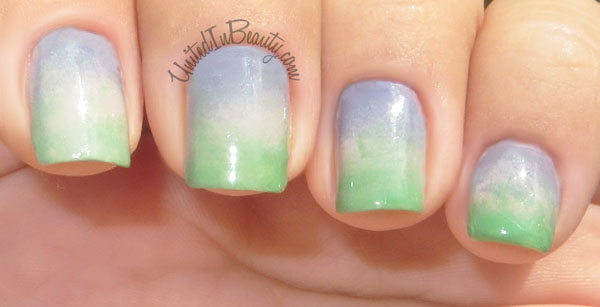
Today I was feeling inspired by the soft color palate of the gorgeous Zoya Rafael Cennamo Spring/Summer 2013 Collection and thought that they would look amazing together. This pretty gradient nail art was done using three of the nail polishes from the new collection. I really love the way the gradient came out, the finished look almost reminds me of a soft watercolor painting.

Gradient Nail Art

In order to create this look, I used three different Zoya polishes and sponged them on to my nail to create the faded gradient design. Zoya Caitlin is at the base of the nail, Zoya Kennedy is in the middle, and Zoya Wednesday is sponged on the tips.


Gradient Nail Art

When using the sponged gradient technique it is common for the result to look a bit thick with noticeable lines of division between color until a top coat is applied, so don't spaz out if you try it and notice it doesn't quite look right yet. No need to freak your freak! I personally almost always use a coat of Seche Vite to smooth out the polish and top off my nails with a glossy finish. 


If you are going to be trying a sponged gradient, you also will want to always keep the sponge damp in order to get the smoothest color blend. I let mine sit in a small cup of water until I am ready to use it. Gradients are so fun! I'd love to hear about your gradients too, what are your favorite colors/polishes to blend together?

SHARE:

May 29, 2013

Nail Art Featuring Zoya Darcy & Josie

Happy Wednesday, friends! To be honest with you, I think mid-week fatigue must be setting in for me today because this color combination and design looked a lot better in my head then it does on my nails, LOL! I'm not even entirely sure what this look is, but alas I shall still present it! Feast your eyes on these shebangys!


This look was done using two coats of Zoya - Josie as a base, then one coat each of China Glaze - White on White and Zoya -Darcy for the design on the nail art. For the shiny finish I used Seche Vite topcoat.


These totally remind me of egg splatters, what do they remind you of? I've just gotta know! What do you see when you look at them?
SHARE:

May 9, 2013

Bloglovin' May Blog Hop!

I wanted to take some time today to feature some fun fellow bloggers that you all may enjoy reading on Bloglovin!

Are you a blogger? Add yourself to the list by following these simple rules.
 
SHARE:

May 7, 2013

Bright Cheetah Print Nail Art

Gathering inspiration from my trip to the local zoo, today I am rocking this super fun and super bright yellow, black and blue cheetah print nail art. Animal prints are some of my favorite designs since they are so eye catching and easy to do. This simple cheetah print design can be created using nail art brushes, dotting tools, or even toothpicks in a pinch. As an added bonus, with cheetah print the color combinations are endless!
Bright Cheetah Print Nail Art
Polishes used: China Glaze - Happy Go Lucky, Ruby Kisses - Teal Envy, Orly - Liquid Vinyl, Wet N' Wild - Silvivor
I'm an old lady now and the zoo wore me the heck out, so I'm just popping in for a quick post today, but if there is enough interest, I may try my hand at putting together a tutorial on how you can re-create this look. Let me know what you think in the comments!


SHARE:
© United In Beauty. All rights reserved.
Blogger Template by pipdig