Hold on to your stockings people, if you thought ugly Christmas sweaters were only for holiday parties at Grandma's house, better chickity-check yo self because they have found quite a cozy home right here on my fingertips too. Ho-Ho-HOLLA if ya hear me!
What started out as a fun idea quickly turned into a not-so-gentle reminder that my stamping skills need some serious work. There will definitely be more stamping to come in the future, just so I can practice up if nothing else. The base for these nails is 3 coats of Zoya Dove. I could have gotten away with 2 coats, but as always I felt the need to overdo it.
The
sweater pattern was done using white Konad stamping polish and stamping
plate 38 from Pueen. The stamping plate I used for the accent nail is Pueen 63,
my first time using both of them and I was pleasantly surprised with
the quality. My pink Konad stamper picked up everything without any
trouble at all, but my white soft "marshmellow" stamper just wasn't
havin' any of it today. I now realize the stamper holds all the power,
lesson learned. I gotta admit, I kind of love this manicure. Bummer it's got to come off for tomorrow's look!
Snag the Look:
Zoya - Dove
Konad White Stamping Polish
Pueen Stamping Plate Collection (Including 38)
Pueen Stamping Plate Collection (Including 63)
Seche Vite Fast Dry Top Coat
Are these ugly Christmas sweaters a hit or a miss for you guys? What do you say?
Trending
December 18, 2014
December 17, 2014
Red and Green Christmas Polka Dots Dotticure - 12 Days of Christmas Holiday Manicure Series Day 6
I've gotten a few requests to come up with a Christmas-y themed manicure for beginners, and that's exactly what I've got for you today! This is a look that anyone can do, and best of all is that it doesn't even require any special tools. If you've got a bobby pin, a toothpick, or even a makeup brush laying around then you've got all you need for this red and green holiday dotticure.
My camera wasn't cooperating with me today, or I would have grabbed a few more photos for you, alas we must work with what we've got, right? BTW, if you follow me over on Instagram, thanks for all the birthday wishes yesterday! You guys are the best!
 |
| Polishes used: China Glaze - Dandy Lyin' Around, OPI - Don't Mess with OPI, Ruby Kisses - Red Cameo |
Let the dots dry completely before adding your top coat, even if it's Seche Vite. I cannot stress this enough, I repeat, let the dots dry! Take it from me... Seriously, if not you'll get some gnarly streaking and it will ruin your manicure, and possibly your day. Once you are complete dry, add your top coat and you've got the finished look!
December 16, 2014
Gold Sparkles with Glittery Bow Accent Nail - 12 Days of Christmas Holiday Manicure Series Day 5
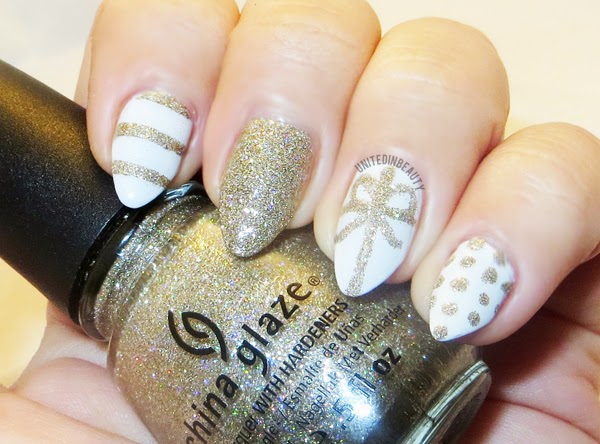
I've never been a huge fan of gold, but lately I can't seem to get enough of it! This manicure is quick and easy and got a lot of compliments today, which is always a plus, right? I think I may have to bust it out again once it comes time for Christmas parties!
I started with 3 coats of OPI - My Boyfriend Scales Walls, which I have found to be the perfect off white shade. I've searched high and low for a white that is not too stark, but not too yellow and so far this seems to be it. After that was completely dry, I used striping tape to create the lines on my index finger, and a medium sized dotting tool to make the polka dots on my pinky.
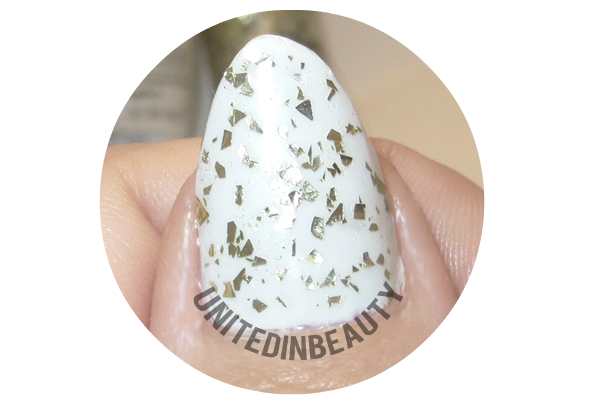
I decided to go full on bling for the middle finger, and used a small nail art brush to draw in the bow accent on my ring finger. Since it was a bit difficult to see in the other photos, I took a close up of my thumbnail and the gold flakes. On my thumb, I used one good coat of Maybelline Color Show Jewels in Gilded in Gold. Well folks, that's it for day 5! See you tomorrow!
How are you all enjoying the 12 days of Christmas Manicures so far? Are there any looks you like to see me create?
December 15, 2014
Winter Snowflakes - 12 Days of Christmas Holiday Manicure Series Day 4
Here we are on day 4 and I just couldn't resist using another one of the gorgeous KBShimmer polishes that came in the mail today as the base for this fun snowflake manicure. I'm not a fan of the cold weather at all, but I don't mind it when it looks this good on my nails!
Just to be sure that the base was complete opaque, I used 3 coats of KBShimmer - Snow way then hand painted the snowflakes using a basic white acrylic paint that I had laying around. This was my first time painting snowflakes, so they could use a bit of work, but bear with me. Since I needed a little extra something, I added the two gemstones to my ring and pointer fingers and gave everything a nice coat of Seche Vite to finish them off. I love this look!
Subscribe to:
Posts (Atom)
© United In Beauty. All rights reserved.


